Annealing your 3D prints is one of the best ways to increase their strength and stress tolerance.
Through a relatively simple process, you can actually turn a standard material like PLA into one of the strongest 3D printer filaments.

In this guide, I’m going to explain what 3D print annealing actually is, and provide step-by-step guides for annealing PLA, Nylon, or ABS in a simple kitchen oven.
I’ll share all the tips I’ve learned to avoid common beginner mistakes and help you strengthen your prints with confidence – so let’s get on with it!
How Annealing Works
Originally used in metallurgy to increase the strength of metal objects, annealing is one of several “heat treatments” used to change the physical properties of metal without changing its shape.
In essence, annealing increases the ductility of a given metal.
With plastics in 3D printing, annealing is used to increase strength and stiffness after an object has been formed. Annealing reduces the stress in highly affected areas and dissipates this out more evenly through the print, making it less likely to fracture at any specific point.

*(Nobody loves the smell of heated plastic; always print and anneal in well-ventilated areas)
(However, when dealing with plastics, the process is not technically annealing. Many years ago someone coined the term when describing this process in plastics, and the name appears to have stuck…)
With plastics, the process is a little different to metals.
FDM printing involves heating the print material so that it can be extruded. However, plastic is a fairly poor conductor of heat, and this heated plastic filament tends to cool unevenly. This uneven cooling introduces stress into a printed object, which is exacerbated by the print’s layered construction.
Most thermoplastics used in FDM printing are polymers, which typically have an unorganized and amorphous structure. Uneven cooling leads to banding, and causes different tensile forces and compression forces to build up in the polymer structure.
To solve this problem, annealing plastic involves gently reheating the substance to its glass transition temperature or just above, but below its melting temperature. This temperature is maintained here for a time, before slowly allowing it to cool.
This reheating and extended cooling increases strength and redistributes the stresses within the printed part, by increasing the amount of large crystalline structures in the plastic.
Note: While we’ll explain the temperatures to anneal for each material, these are approximations, so try it on a test print first. The ‘same’ material from different suppliers can have slightly varying glass transition temperatures, and ovens can typically have thermostats that are +/-10% out.
How to Anneal PLA

PLA is known as a relatively weak material, but suits annealing due to its relatively low melting (175°C) and glass transition temperatures (60°C), so the annealing process will more effectively meld the plastic layers of your model, making parts less brittle.
1. Set your oven to 60°C
To anneal PLA 3D prints, start by turning your cooking oven on and setting the temperature to 60°C.
(If you have a PLA+ filament or similar higher-temp filament blend, consider increasing the oven temperature to 65 or 70°C.)

Only use an electric oven, as gas or flame ovens typically produce too much heat and ruin your 3D prints. You should also experiment with your oven first, as the stated temperature might be a bit hotter or cooler than the true temperature inside.
2. Fill your container with sand
While your oven is heating up, take an oven-safe container such as a baking pan, and fill it with sand.
Adding sand to the mix is especially useful when annealing PLA prints, as they are known to warp due to their low rigidity and heat resistance.
Using sand also creates a more evenly strengthened print, which is why I recommend the sand annealing process for not just PLA prints, but also ABS and Nylon.
3. Bury your 3D prints in the sand
Next, bury your 3D prints in the sand-filled container until they are completely covered. Make sure you try to pack and compress the sand with your hands a bit so there isn’t too much air.
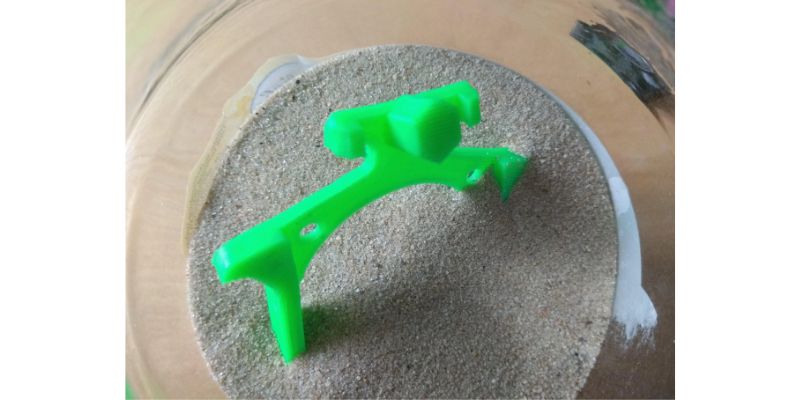
Also, it’s important that your 3D prints aren’t touching the container. They should only be in contact with the sand, and you should leave at least a 5mm gap between the inserted prints and the edges of the pan.
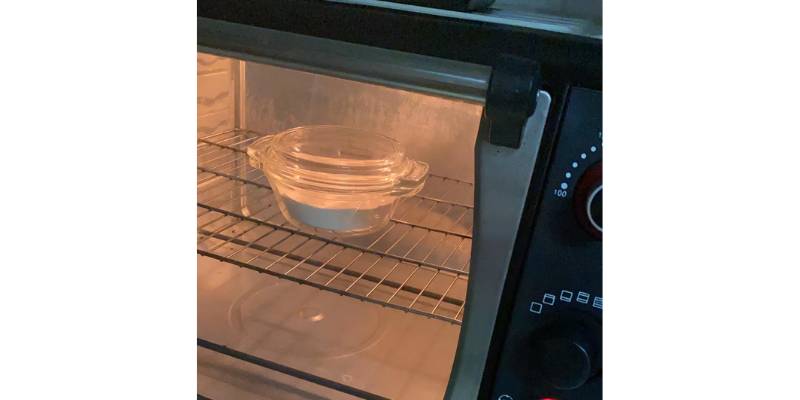
4. Put the print in the oven for an hour
Once your oven is ready, insert the container containing your 3D print into the middle rack of your oven, and let it sit there for an hour.
Make sure to set a timer, as your 3D prints will deform if you leave them for too long. Also, do not open the oven door during this time, as any loss of heat will worsen your annealing results.
When your PLA is sitting in the oven, the plastic softens and becomes amorphous, releasing some of the stress caused by the printing process and allowing the polymer strands to rearrange. Over time, the polymers move, stretch, realign, and recrystallize, forming a sturdier internal matrix, which is what makes your 3D prints stronger.
Additionally, because the oven temperature is fairly low, your PLA prints won’t melt or lose their shape.
5. Let your prints sit
After your timer is up, turn off the oven, but don’t open the door.
Let the container sit for 5-10 minutes so the prints cool down slowly, and then move them out of the oven, letting them sit (still buried) for another 10-20 minutes.

This gradual cooling process prevents warping, and prevents the internal stresses that occurred during the original printing process.
Once the container feels room temperature, it’s time to dig out your 3D prints and inspect their strength. It’s that easy!
You’ll notice that your annealed 3D prints look slightly smaller now. The annealing process shrinks the X/Y dimensions of prints, while actually expanding their height. This is all a result of material shrinkage and tension from the annealing process, and it’s completely normal.
On average, you’ll see PLA shrinkage of about 5% on the X and Y axes, and growth of about 2% on the Z axis.
(You can compensate for this beforehand by making your prints slightly wider and longer, and slightly smaller, in your original CAD file or within your 3D slicer.)

You should see some significant strength improvements in your PLA object. A 25-40% increase in strength, stiffness, and durability is not uncommon and will make your 3D prints much more practical for functional applications.
Your annealed PLA prints will also be much more heat-resistant. So, if you need stiff, high-tensile PLA parts with good heat resistance, annealing can be the answer.
How to Anneal ABS
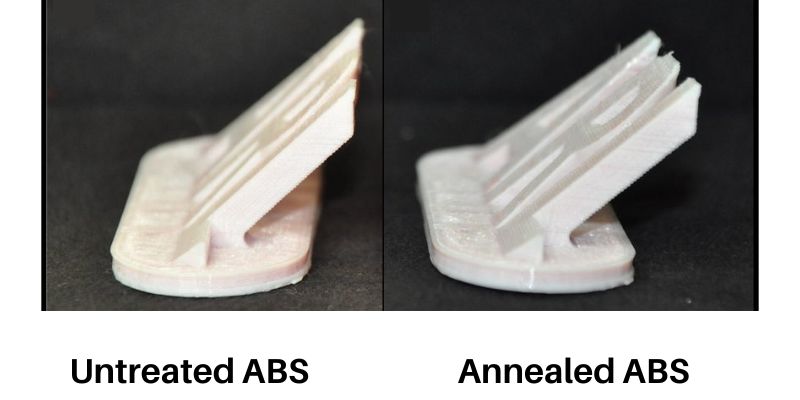
ABS tends to be stronger and less brittle than PLA. It also has a higher melting temperature than PLA. However, despite this, ABS is also an excellent candidate for annealing as it gains significant impact and heat resistance.
ABS’ higher glass transition temperature (105°C) requires a higher oven temperature of around 100°C to anneal it.
You can try higher temperatures than this, but the ABS may warp and deform.
In the same way you anneal PLA, wait for your oven to reach the correct temperature, and then let your ABS part sit for around an hour (you can use a thermometer to confirm the correct temperature).
Next, get an oven-safe container, fill it with sand, and bury your ABS 3D prints deep inside. Follow all of the same procedures as we described in the PLA annealing process, such as properly separating your prints from the edges.
When the oven is at temperature, place your container in the oven for 30 minutes, plus an additional 15 minutes for every 3mm (1/8 inch) of object cross-section.
This gives the object enough time to absorb enough heat energy to allow the polymer chains to move, stretch, realign, and recrystallize, forming a sturdier internal matrix. Do not open the oven door during the annealing process.
Once the time is up, turn the oven off, leaving your object in the oven. This gradual cooling process reduces warping. Once the oven is at room temperature, remove your objects.
Once again, you may notice shrinkage and growth along the X, Y, and Z axes. As was the case with PLA, this shrinkage can be compensated for in the design and printing processes.
Expect to see an improvement in the strength, stiffness, and stability of the annealed object, along with improvements in temperature stability.
How to Anneal Nylon
Nylon 12 is stronger and less brittle than either PLA or ABS, with a higher melting temperature than ABS. Annealing can significantly increase its heat deflection temperature, which when combined with Nylon’s high strength makes annealed Nylon 12 a great choice for applications where heat and durability are issues.
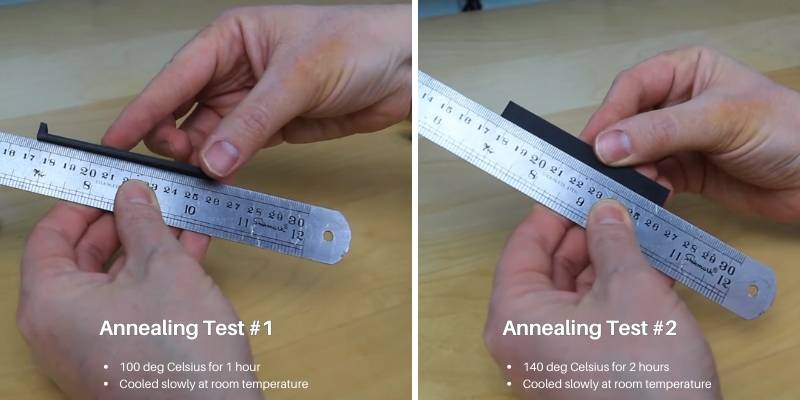
The glass transition temperature of Nylon 12 is around 98°C (208°F). However, its melting temperature is a respectable 178°C-181°C (352°F to 358°F). Because of this, you want to set your oven temperature to 130°C-140°C (266°F to 284°F).
This temperature is high enough to soften the material, releasing the stress caused by extrusion while increasing crystallization, but not high enough to melt the Nylon layers.
To get started, set your oven to 130°C-140°C, and then fill an oven-safe container with sand. Bury your Nylon 3D prints in the sand while keeping the model separated from the edges or bottom of the container. It should only be touching the sand grains.
Once the oven is at temperature, place the container inside, and let it sit for an hour. Use an accurate thermometer to determine temperature prior to starting the annealing process, and use a convection oven if possible.
Place the Nylon object on an oven-safe surface and put it in the oven for two hours. This allows for polymer chain realignment and recrystallization. Don’t open the oven while annealing is underway.
When the two hours are up, turn the oven off, leave the object inside, and let the oven cool incrementally to room temperature to reduce warping and maximize the benefits gained through annealing.
When the oven is at room temperature, remove your objects. There may be shrinkage and growth along the X, Y, and Z axes.
While you will see a slight improvement in the strength, the main improvement from annealing Nylon is in temperature stability. Annealing generally increases a Nylon object’s heat deflection temperature by over 40%.
Annealing Polycarbonate
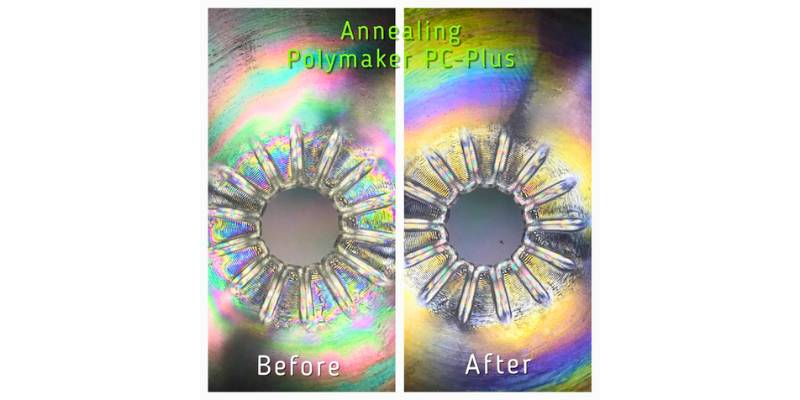
The Polycarbonate annealing process is similar, using oven temperatures in the 120°C-130°C range. Although PC has a higher printing temperature, its softening range is much greater than other materials.
Related articles:
- Infill settings for 3D printing
- How to smooth PLA
- How to acetone smooth ABS
- Types of 3D printer filament